
 English
 Spanish
 Turkish
Three-Ball Breathing Trainer: Your Ultimate Companion for Breathing Exercises!
Three-Ball Breathing Trainer: Your Ultimate Companion for Breathing Exercises!
Have you ever experienced these breathing alerts? Waking up in the morning always feeling short of breath? Sitting for long periods makes your chest feel as if a stone is pressing on it, and climbing just a few flights of stairs leaves you gasping for air. When your respiratory muscles start to “struggle,” your health may quietly send out a warning signal. Today, I’d like to share a scientifically-backed method for exercising your respiratory muscles using a three-ball breathing trainer. Just 10 minutes a day can give your respiratory muscles an efficient "workout"!
Respiratory Muscles: The Overlooked “Human Engine”
Our respiratory muscles are like a precise “human engine.” Key components such as the diaphragm and intercostal muscles work silently to maintain normal breathing. Once these muscles weaken, a series of issues can arise: shallow breathing and shortness of breath are just the beginning. Over time, the risk of conditions like pneumonia may even increase.
The three-ball breathing trainer acts like “customized dumbbells” for your respiratory muscles. Through scientific resistance training, it helps strengthen these muscles, making breathing easier and more efficient.
I. Demystifying the Trainer: A Small Device with Hidden Ingenuity
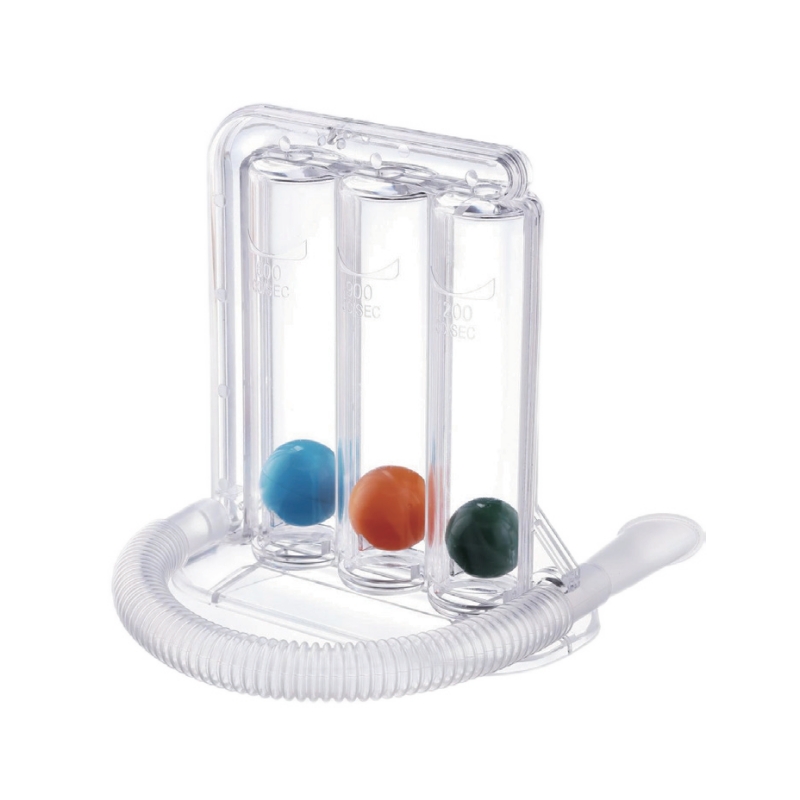
The three-ball breathing trainer has a simple yet unique design, consisting of a transparent tube and three colored balls (blue, yellow, red). Don’t underestimate these three balls—they are the key to the training, each with a different weight and representing varying levels of resistance:
Blue Ball: The lightest, suitable for beginners or those with weaker physical strength.
Yellow Ball: Medium resistance, ideal for daily maintenance training.
Red Ball: The heaviest, serving as an “advanced challenge” for those with some experience who want to further enhance their respiratory muscle strength.
II. Three Simple Steps to Get Started
✅ Step 1: Assume the Correct Posture, Sit Upright
Sit straight in a chair, relax your shoulders, keep your back against the chair, and gently bite the mouthpiece of the trainer as if sipping through a straw. This ensures your respiratory muscles are in the “optimal position for exertion.”
✅ Step 2: Inhale Slowly and Deeply
Imagine yourself in a field of flowers, taking a deep breath. Feel your abdomen slowly expand like a balloon while using your breath to lift the balls. Try to keep the yellow and red balls floating in the air, as this better exercises your respiratory muscles. Be careful not to raise your shoulders while inhaling.
✅ Step 3: Exhale Steadily and Slowly
Purse your lips (as if blowing out a candle) and exhale slowly, making sure to expel all the air.
It is recommended to do 3 sets per day, with 10 repetitions per set, and rest for 1 minute between sets. If you feel dizzy at the beginning, stop immediately. Gradual progression is key.
III. Who Needs This Training? Find Out If It’s for You
Post-Surgery Recovery Patients:
After heart or lung surgery, using this trainer to exercise respiratory muscles can help prevent atelectasis, promote lung re-expansion, and facilitate a smoother recovery.Chronic Disease Patients:
Patients with chronic conditions such as COPD, asthma, or pulmonary fibrosis can improve their breathing capacity, alleviate symptoms like shortness of breath, and enhance their quality of life through consistent training.Healthy Individuals:
Office workers who sit for long hours and often experience chest tightness, or fitness enthusiasts looking to boost lung vitality and improve athletic performance, can benefit from using the trainer to make breathing easier and their bodies lighter.
IV. Avoid These Common Mistakes
❌ Mistake 1: Trying to Lift All the Balls at Once
Some users may want to challenge themselves by lifting all the balls right away, but this not only reduces training effectiveness but can also lead to respiratory muscle fatigue.
✅ Correct Approach: Start with the yellow ball. Focus on steadily lifting and holding it for 3 seconds. Once your respiratory muscles adapt, gradually progress to the red ball to increase training intensity.
❌ Mistake 2: Breathing Too Quickly, Like Panting
Rapid breathing not only fails to achieve training effects but may also cause dizziness due to lack of oxygen.
✅ Correct Approach: Strictly control your breathing rhythm—inhale for 3 seconds and exhale for 6 seconds. Treat each breath like a slow-motion scene, ensuring it is steady and effective.
❌ Mistake 3: Not Cleaning the Trainer After Use
The mouthpiece comes into direct contact with your mouth, and failing to clean it regularly can lead to bacterial growth.
✅ Correct Approach: Rinse the mouthpiece with clean water after each use. Disinfect it weekly with an alcohol wipe to ensure hygiene and safety.
If you experience chest pain or other severe discomfort during training, stop immediately and consult a doctor.
Visit us at: www.kellyunion.com


